
Loading...
Loading...

A room-by-room checklist makes insurance inventory work easier because it mirrors how people actually think about their belongings. It is easier to remember what was in the living room or office than to build one giant unsorted list.
The checklist below helps you move room by room, prioritize the most important rows first, and keep the inventory easier for an adjuster to review.
Fastest approach: document major items first, assign them to rooms, and keep one spreadsheet with room, item, value, and proof reference columns.
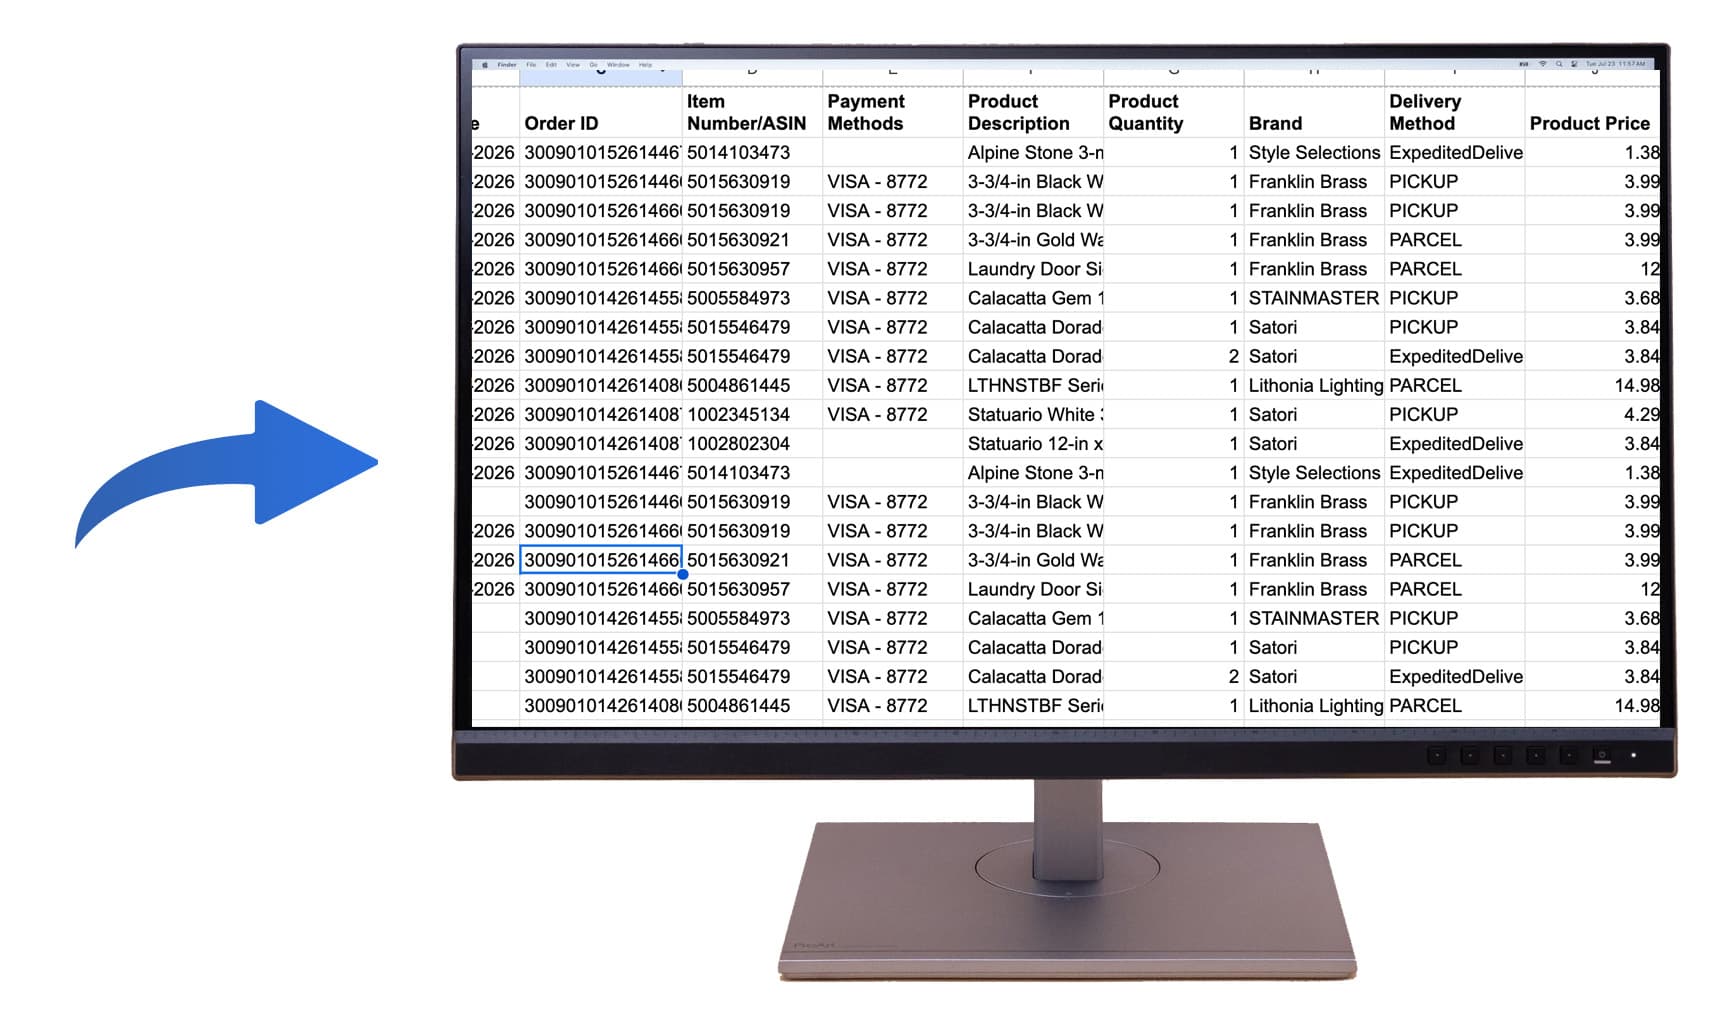
A checklist helps you remember the rooms. Purchase history helps you prove the rows.
Use exported purchase history to fill the date, amount paid, and proof-reference columns faster, then map those items back into room sections.
If you want more than a checklist, use the insurance claim inventory workflow to turn purchase records into a room-by-room spreadsheet for your adjuster.
Room grouping helps the adjuster understand the loss faster and reduces the chance that items are duplicated, missed, or left without context.
Start with the rooms affected by the claim: living areas, bedrooms, kitchen, office, garage, laundry room, storage, basement, and outdoor areas if relevant.
Yes, but usually after the higher-value and easier-to-prove rows are documented. Prioritize major items first, then fill in smaller household contents as needed.
Yes. A room tells the adjuster where the item belonged, while a category such as electronics, furniture, or kitchenware helps with sorting and review.